
Some useful things that don't belong anywhere else. Some are beetle related, some are not!

Click to enlarge
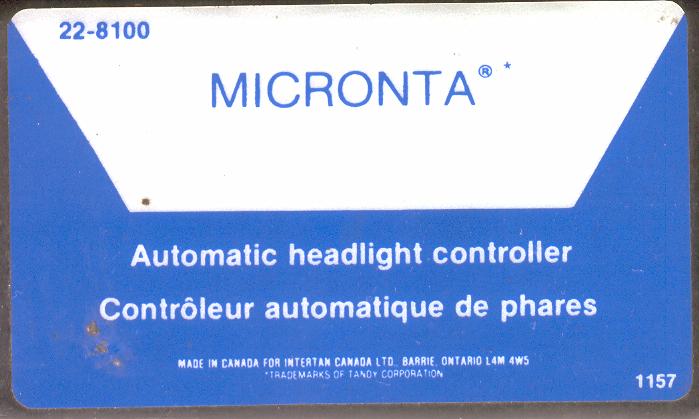
This is the label and wiring for the Micronta® (Radio Shack) Automatic headlight system. Model # 22-8100.

Click to enlarge
This is the Micronta® system wired (tapped) into the beetle wiring.
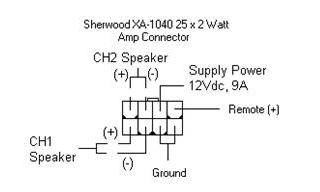
Molex connector pinout diagram for an old Sherwood XA-1040 2 x 25 Watt amplifier.
In another recent email, this person has examined the innards of the amplifier and has discovered this:
" By the way, it turns out the "engine" of this device is a Toshiba TA-8210L amplifier IC, which is in fact rated 16-20W (4Ohm load) for the voltages normally found in vehicles, rather than the 25W the device boasts on its case."
I received this email and realized I must do some explaining...
"Hello, I was looking for some information about a Sherwood XA-1040 amp I picked up at a Goodwill store. Your wiring harness diagram was very useful (and the only one I could find). I do have one question: what is the "remote" wire? The amp currently does not work and I want to make sure I've got it wired properly before chucking it in the garbage. Thanks for any info you can provide."
In Reply:
The "remote" (+) wire is the wire that is supposed to be attached to the positive ignition wire so that the amp only turns on when the car ignition is turned on. The best way (if you have it) is to attach the "remote" wire to the "remote" amp terminal on the back of the car stereo (this allows for the amp to turn on only when the stereo is on). If you need to test the amp, you can hook the "remote" wire up to the positive (+) terminal of the battery. The orange light on the power switch should light up. You can also bypass the ignition switch by wiring a switch from the positive terminal of the battery to the amp "remote wire" (This will let you run the amp when the car is turned off). Or you can do what I did and connect a switch between the stereo "remote" terminal and the amp (so that it turns off with the car, the stereo or by personal preference). See Diagram below.
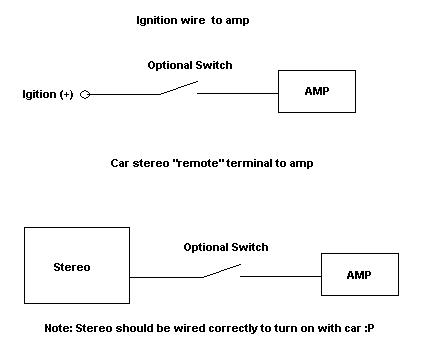
Wiring options for the "remote" wire.